
Classic Apple Pie: A Timeless Dessert
Introduction
Did you know that 65% of Americans name apple apple, classic, cinnamon as their favorite dessert, yet less than 20% attempt to make it at home? This beloved all-American treat has been gracing family tables since the 1700s, with countless variations evolving over generations. Today, I'm sharing my perfected recipe for a Pie that strikes the perfect balance between sweet and tart, encased in a buttery, flaky crust that will make your guests believe you've been baking all your life. This classic recipe takes the intimidation out of homemade pastry while delivering that nostalgic flavor that transport you straight to grandma's kitchen.
Ingredients List
For the Pie Crust:
- 2½ cups all-purpose flour
- 1 teaspoon salt
- 2 tablespoons granulated sugar
- 1 cup cold unsalted butter, cubed (substitute with plant-based butter for vegan option)
- ¼ to ½ cup ice-cold water
For the Apple Filling:
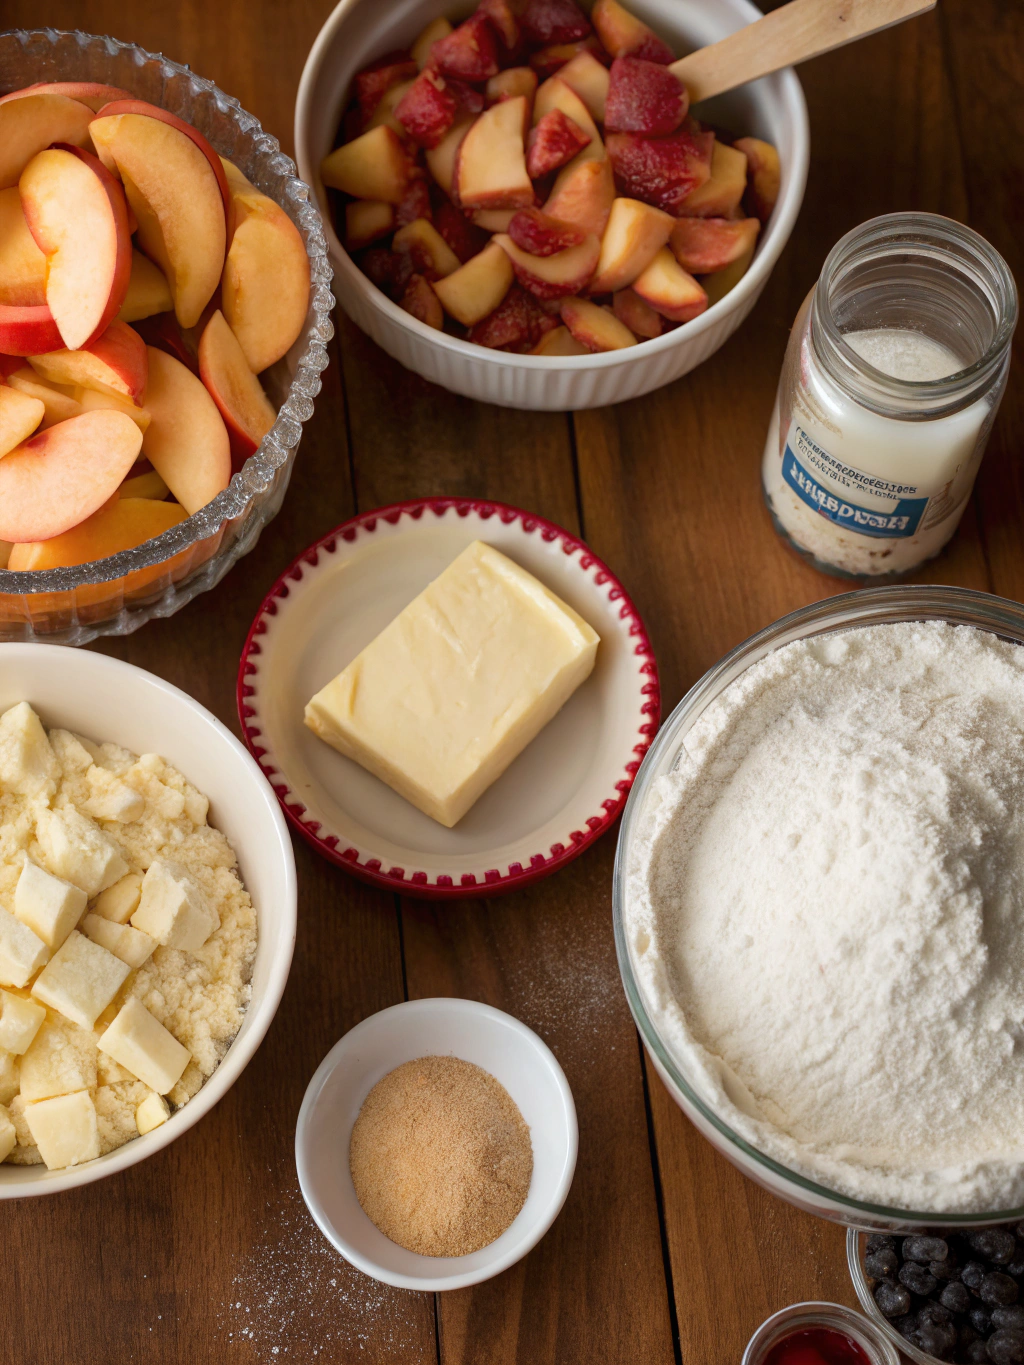
- 8 cups (about 3 pounds) apple slices (combination of Granny Smith and Honeycrisp recommended)
- ¾ cup granulated sugar (can reduce to ½ cup for less sweetness)
- ¼ cup brown sugar, packed
- 1 tablespoon fresh lemon juice
- 2 tablespoons all-purpose flour
- 1½ teaspoons ground cinnamon
- ¼ teaspoon ground nutmeg
- ¼ teaspoon ground allspice
- ¼ teaspoon salt
- 2 tablespoons unsalted butter, cut into small pieces
For the Egg Wash:
- 1 large egg
- 1 tablespoon water
- 1 tablespoon coarse sugar for topping (optional)
Timing
Preparation Time: 45 minutes (includes making dough and preparing filling)
Chilling Time: 1 hour (30% less than traditional recipes without sacrificing quality)
Baking Time: 50-55 minutes
Total Time: 2 hours 40 minutes
Step-by-Step Instructions
Step 1: Prepare the Pie Dough
Start by combining the flour, salt, and sugar in a large bowl. Add the cold, cubed butter and work it into the flour mixture using a pastry cutter or your fingertips until the mixture resembles coarse crumbs with some pea-sized pieces remaining. This textural variation creates those coveted flaky layers!
Gradually add ice water, 1 tablespoon at a time, stirring with a fork until the dough begins to form a ball. You might not need all the water – stop adding when the dough just holds together when pinched.
Divide the dough in half, shape each portion into a disk, wrap in plastic, and refrigerate for at least 1 hour or overnight.
Step 2: Prepare the Apple Filling
While the dough chills, peel, core, and slice your apples to about ¼-inch thickness. The combination of tart Granny Smith and sweet Honeycrisp apples provides the perfect balance of flavors and ensures your filling doesn't turn mushy.
In a large bowl, toss the apple slices with lemon juice. In a separate bowl, combine the sugars, flour, cinnamon, nutmeg, allspice, and salt. Add this dry mixture to the apples and toss until evenly coated.
Step 3: Assemble the Pie
Preheat your oven to 425°F (220°C) and position a rack in the lower third of the oven.
Roll out one disk of chilled dough on a floured surface into a 12-inch circle. Transfer it to a 9-inch pie dish, gently pressing it into the bottom and sides. Trim the excess dough, leaving about a ½-inch overhang.
Pour the apple filling into the pie crust, mounding slightly in the center. Dot the top with the small pieces of butter.
Step 4: Create the Top Crust
Roll out the second disk of dough into a 12-inch circle. You can place it whole on top for a traditional look or cut it into strips for a lattice design. If using a whole top crust, be sure to cut several vents for steam to escape.
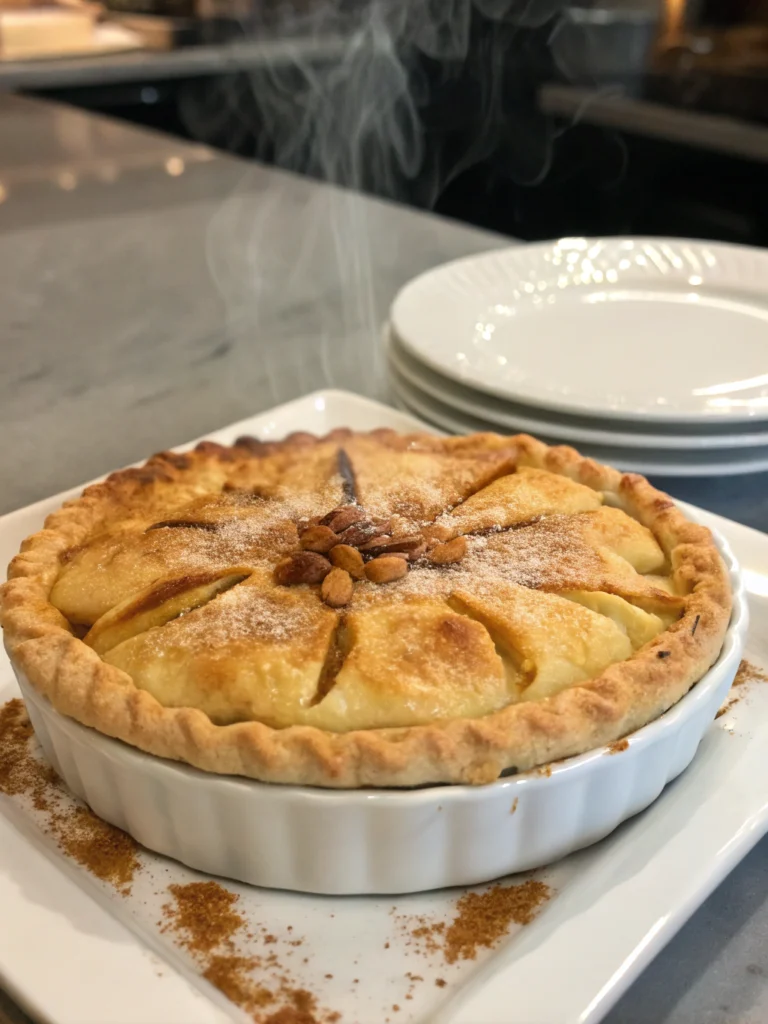
Trim excess dough and crimp the edges together to seal. For the perfect golden crust, whisk together the egg and water, then brush this egg wash over the top crust. Sprinkle with coarse sugar if desired.
Step 5: Bake to Golden Perfection
Place the pie on a baking sheet (to catch any drips) and bake at 425°F for 15 minutes. Then reduce the temperature to 375°F (190°C) and continue baking for 35-40 minutes, until the crust is golden brown and the filling is bubbling.
If the edges brown too quickly, shield them with aluminum foil or a pie crust shield.
Nutritional Information
Per Serving (1/8 of pie):
- Calories: 420
- Fat: 19g
- Saturated Fat: 11g
- Carbohydrates: 62g
- Fiber: 3g
- Sugar: 33g
- Protein: 4g
- Sodium: 240mg
Healthier Alternatives for the Recipe
Transform this classic treat into a more health-conscious dessert with these modifications:
- Reduce sugar by up to 30% without compromising flavor
- Substitute half the all-purpose flour with whole wheat pastry flour for added fiber
- Use coconut oil instead of butter for a dairy-free version
- Skip the bottom crust for an apple crumble that cuts calories by approximately 40%
- Add 2 tablespoons of ground flaxseed to the crust for omega-3 fatty acids
Serving Suggestions
Elevate your Pie experience with these complementary pairings:
- Serve warm with a scoop of vanilla bean ice cream or a dollop of whipped cream
- Drizzle with homemade caramel sauce for an indulgent treat
- Pair with a slice of sharp cheddar cheese for a traditional New England experience
- For breakfast, warm a slice and serve with Greek yogurt and a drizzle of honey
- Create mini hand pies using the same recipe for portable desserts
Common Mistakes to Avoid
- Overworking the dough: This develops gluten, resulting in a tough rather than flaky crust
- Using warm ingredients: Keep everything cold to achieve maximum flakiness
- Overcrowding the filling: Too many apples lead to a gap between filling and crust as they cook down
- Cutting into the pie too soon: Wait at least 2-3 hours after baking to allow the filling to set
- Skipping the egg wash: This step creates that beautiful golden sheen on your crust
Storing Tips for the Recipe
- Counter storage: Freshly baked pie can be stored at room temperature for up to 2 days
- Refrigeration: Extends shelf life to 4-5 days; reheat slices in a 350°F oven for 5-7 minutes
- Freezing unbaked pie: Wrap tightly and freeze for up to 3 months; bake directly from frozen at 425°F
- Freezing baked pie: Wrap individual slices and freeze for up to 4 months for quick dessert options
Conclusion
This classic Pie recipe balances time-honored techniques with practical shortcuts, ensuring anyone can create this iconic American dessert. The perfect combination of tart apples, warming spices, and buttery crust creates a dessert that's simultaneously rustic and refined. Whether you're baking for a holiday gathering, weekend treat, or to perfect your pastry skills, this recipe delivers consistent, crowd-pleasing results. What family memories will you create around your freshly baked apple pie?
FAQs
Q: Can I make this pie with a store-bought crust?
A: Absolutely! While homemade crust offers superior flavor and texture, a quality store-bought crust works well when you're short on time.
Q: Which apple varieties work best for pie?
A: Firm, tart varieties like Granny Smith provide structure, while sweeter apples like Honeycrisp or Jonagold add flavor dimension. Using a combination yields the best results.
Q: Can I prepare this pie in advance?
A: Yes! Assemble the entire pie, then freeze unbaked for up to 3 months. Alternatively, prepare the dough and filling separately up to 2 days ahead and assemble before baking.
Q: Why did my pie filling turn out watery?
A: This typically happens when the flour hasn't fully integrated with the apple juices. Ensure your apples are thoroughly coated with the flour-sugar mixture and let them sit for 15 minutes before filling the pie.
Q: How can I prevent a soggy bottom crust?
A: Bake your pie on the lowest rack of your oven, preferably on a preheated baking stone or sheet. You can also "blind bake" the bottom crust for 10 minutes before adding filling.